

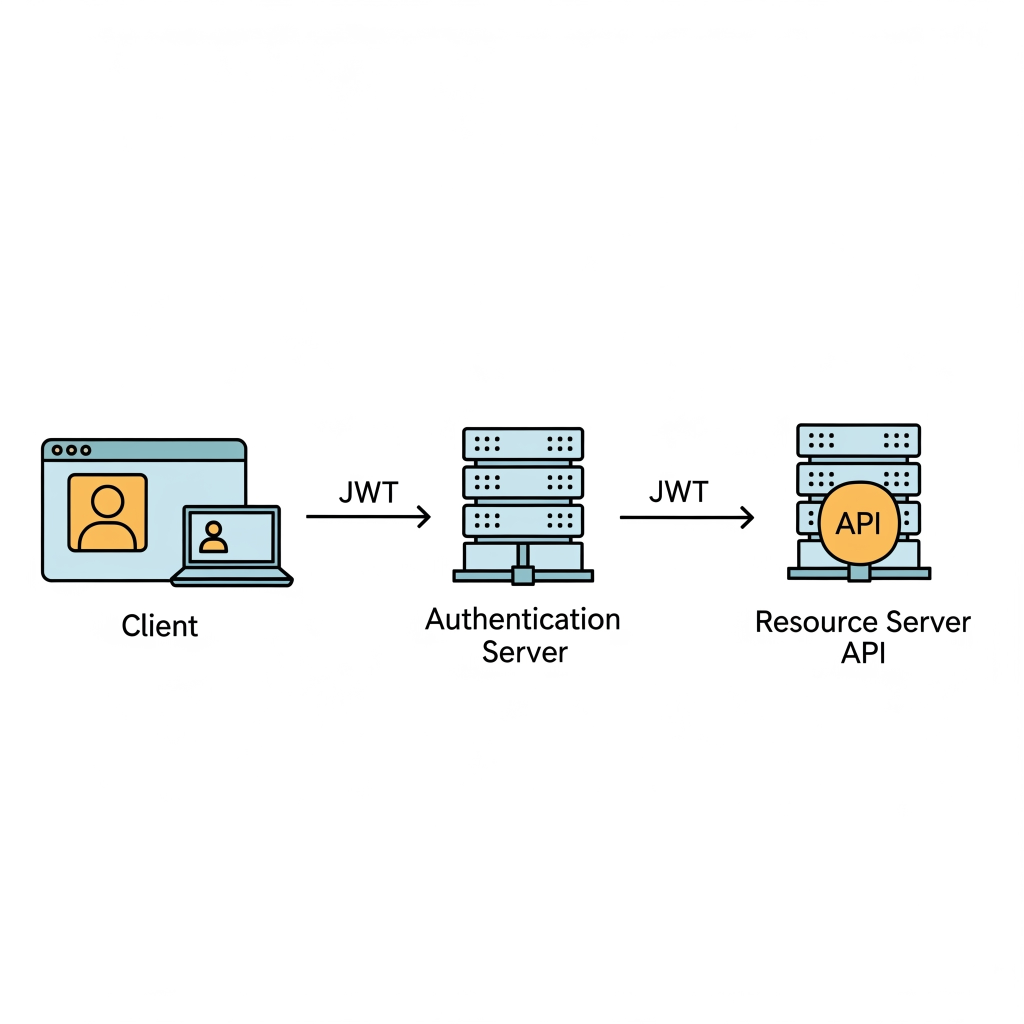
JSON Web Tokens (JWT) have become a standard for securing APIs, offering a stateless and efficient way to handle user authentication. This blog post will walk you through the entire JWT authentication flow, from a user logging in to making subsequent API requests.
The JWT Authentication Flow
1. The Client Provides Credentials
The process begins when a client (e.g., a web or mobile application) sends authentication credentials to the server. This is typically a username and password submitted via an HTTP POST request to a login endpoint.
2. Server Verifies Credentials
Upon receiving the credentials, the server verifies them against its stored user data. This involves checking if the username exists and if the provided password matches the one stored in the database.
3. Generates a JWT and Signs It
Once the credentials are validated, the server generates a JSON Web Token. A JWT is a compact, URL-safe string that contains three parts, separated by dots (.):
- Header: Contains metadata about the token, such as the type of token (JWT) and the signing algorithm used (e.g., HMAC SHA256 or RSA).
- Payload: Contains the claims, which are statements about the user and additional data. Common claims include the user ID, username, and other permissions.
- Signature: Created by taking the encoded header, the encoded payload, and a secret key known only to the server. This signature is used to verify that the token hasn’t been tampered with.
The server then signs the token using the secret key, ensuring its integrity.
4. Returns Signed JWT
The server sends the newly generated and signed JWT back to the client as part of the successful login response.
5. Stores the JWT Securely
The client receives the JWT and stores it securely. This is often done in localStorage, sessionStorage, or an HTTP-only cookie. Using an HTTP-only cookie is a common practice to protect against Cross-Site Scripting (XSS) attacks.
6. Includes the JWT in Each API Request
For every subsequent API request that requires authentication, the client includes the JWT in the Authorization header of the HTTP request. The standard format is Authorization: Bearer <JWT>.
7. Verifies the JWT
When the server receives an API request with a JWT, it performs several checks to verify its authenticity and validity:
- Signature Verification: The server uses the same secret key to re-create the signature and compares it with the signature provided in the token. If they don’t match, the token is considered invalid and the request is rejected.
- Expiration Check: The server checks the
exp(expiration) claim in the payload to ensure the token has not expired. - Issuer and Audience: The server can also check the
iss(issuer) andaud(audience) claims to ensure the token was issued by the correct server and is intended for the correct recipient.
If all checks pass, the server trusts the user’s identity and processes the API request.
8. Uses a Refresh Token
JWTs have a short expiration time to minimize the risk of a compromised token being used. To provide a seamless user experience, a refresh token is often used.
When the initial access token expires, the client can send a refresh token to a designated endpoint. The server verifies this refresh token and, if valid, issues a new, short-lived access token and a new refresh token. This allows the user to remain authenticated without having to re-enter their credentials.
Conclusion
JWT provides a robust, stateless, and scalable solution for API authentication. By understanding this workflow, you can confidently build secure applications that leverage the power of JSON Web Tokens.